The vim-notes plug-in for the Vim text editor makes it easy to manage your notes in Vim:
:Note command to create a new buffer and load the appropriate file type and syntax
:edit, :tabedit and :split by starting the filename with note:, as in :edit note:todo (the part after note: doesn’t have to be the complete note title and if it’s empty a new note will be created)\en mapping or :NoteFromSelectedText command (there are similar mappings and commands for opening split windows and tab pages):Note anything to edit a note containing anything in its title (if no notes are found a new one is created with its title set to anything)
:Note and :DeleteNote commands support tab completion of note titles:DeleteNote command enables you to delete the current note:SearchNotes keyword … searches for keywords and :SearchNotes /pattern/ searches for regular expressions
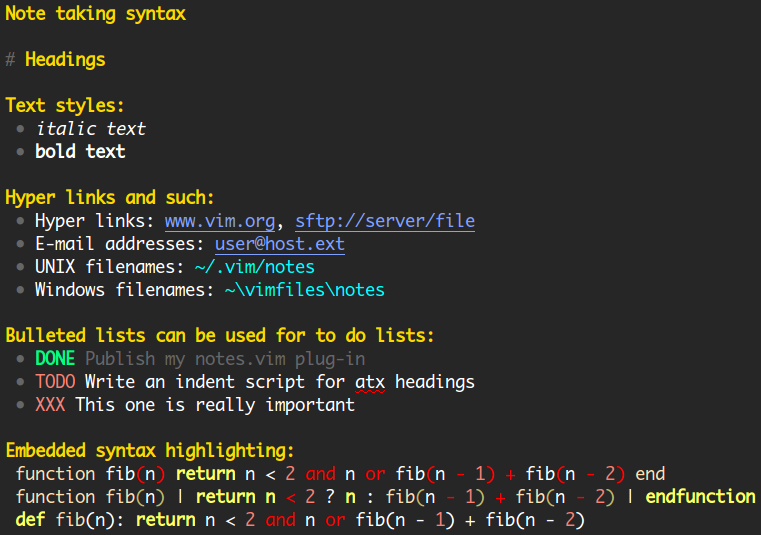
:SearchNotes command supports tab completion of keywords and sorts candidates by relevance (Levenshtein distance):SearchNotes searches for the word under the cursor (if the word starts with @ that character will be included in the search, this means you can easily search for @tagged notes):RelatedNotes command find all notes referencing the current file:RecentNotes command lists your notes by modification date, starting with the most recently edited note# marks at the start of the line) and supports text folding based on these headers. This allows easy navigation within notes that contain large (and possibly nested) sections of text separated by headers. Here’s a screen shot of text folding.{{{type … }}} (triple back ticks ala GFM are also supported) which allows you to embed highlighted code and configuration snippets in your notesHere’s a screen shot of the syntax mode (using the Slate color scheme and the Monaco font):
Please refer to the installation instructions available on GitHub. Once you’ve installed the plug-in you can get started by executing :Note or :edit note:, this will start a new note that contains instructions on how to continue from there (and how to use the plug-in in general).
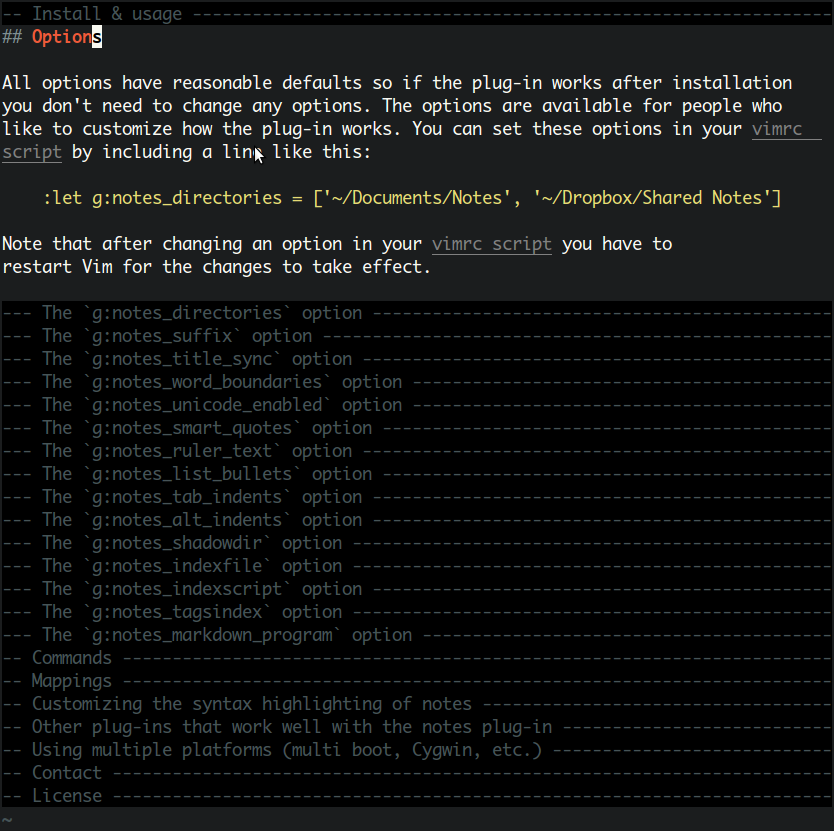
All options have reasonable defaults so if the plug-in works after installation you don’t need to change any options. The options are available for people who like to customize how the plug-in works. You can set these options in your vimrc script by including a line like this:
:let g:notes_directories = ['~/Documents/Notes', '~/Dropbox/Shared Notes']
Note that after changing an option in your vimrc script you have to restart Vim for the changes to take effect.
g:notes_directories option
Your notes are stored in one or more directories. This option defines where you want to store your notes. Its value should be a list (there’s an example above) with one or more pathnames. The default is a single value which depends on circumstances but should work for most people:
If the profile directory where the plug-in is installed is writable, the directory misc/notes/user under the profile directory is used. This is for compatibility with Pathogen; the notes will be stored inside the plug-in’s bundle.
If the above doesn’t work out, the default depends on the platform: ~/vimfiles/misc/notes/user on Windows and ~/.vim/misc/notes/user on other platforms.
In the past the notes plug-in only supported a single directory and the corresponding option was called g:notes_directory. When support for multiple notes directories was introduced the option was renamed to g:notes_directories to reflect that the value is now a list of directory pathnames.
For backwards compatibility with old configurations (all of them as of this writing :-) the notes plug-in still uses g:notes_directory when it is defined (its no longer defined by the plug-in). However when the plug-in warns you to change your configuration you probably should because this compatibility will be removed at some point.
g:notes_suffix option
The suffix to add to generated filenames. The plug-in generates filenames for your notes based on the title (first line) of each note and by default these filenames don’t include an extension like .txt. You can use this option to make the plug-in automatically append an extension without having to embed the extension in the note’s title, e.g.:
:let g:notes_suffix = '.txt'
g:notes_title_sync option
When you rename a file in your notes directory but don’t change the title, the plug-in will notice this the next time you open the note in Vim. Likewise when you change the title in another text editor but don’t rename the file. By default the plug-in will prompt you whether you want it to update the title of the note, rename the file on disk or dismiss the prompt without doing anything.
If you set this option to the string 'no' this feature will be completely disabled. If you set it to 'change_title' it will automatically change the title to match the filename. If you set it to 'rename_file' it will automatically rename the file on disk to match the title.
This option only concerns the behavior of vim-notes when you open an existing note; it does not change the fact that when you change a note’s title in Vim and then save the note, the file is renamed (this is a fundamental feature of the vim-notes plug-in).
g:notes_word_boundaries option
Old versions of the notes plug-in would highlight note titles without considering word boundaries. This is still the default behavior but the plug-in can now be told to respect word boundaries by changing this option from its default:
:let g:notes_word_boundaries = 1
g:notes_unicode_enabled option
By default the vim-notes plug-in uses Unicode characters (e.g. list bullets, arrows, etc.) when Vim’s ‘encoding’ option is set to UTF-8. If you don’t want Unicode characters in your notes (regardless of the ‘encoding’ option) you can set this option to false (0):
:let g:notes_unicode_enabled = 0
g:notes_smart_quotes option
By default the notes plug-in automatically performs several substitutions on the text you type in insert mode, for example regular quote marks are replaced with curly quotes. The full list of substitutions can be found below in the documentation on mappings. If you don’t want the plug-in to perform these substitutions, you can set this option to zero like this:
:let g:notes_smart_quotes = 0
g:notes_ruler_text option
The text of the ruler line inserted when you type *** in quick succession. It defaults to three asterisks separated by spaces, center aligned to the text width.
g:notes_list_bullets option
A list of characters used as list bullets. When you’re using a Unicode encoding this defaults to ['•', '◦', '▸', '▹', '▪', '▫'], otherwise it defaults to ['*', '-', '+'].
When you change the nesting level (indentation) of a line containing a bullet point using one of the mappings Tab, Shift-Tab, Alt-Left and Alt-Right the bullet point will be automatically changed to correspond to the new nesting level.
The first level of list items gets the first bullet point in g:notes_list_bullets, the second level gets the second, etc. When you’re indenting a list item to a level where the g:notes_list_bullets doesn’t have enough bullets, the plug-in starts again at the first bullet in the list (in other words the selection of bullets wraps around).
g:notes_tab_indents option
By default Tab is mapped to indent list items and Shift-Tab is mapped to dedent list items. You can disable these mappings by adding the following to your vimrc script:
:let g:notes_tab_indents = 0
g:notes_alt_indents option
By default Alt-Right is mapped to indent list items and Alt-Left is mapped to dedent list items. You can disable these mappings by adding the following to your vimrc script:
:let g:notes_alt_indents = 0
g:notes_shadowdir option
The notes plug-in comes with some default notes containing documentation about the plug-in. This option defines the path of the directory containing these notes.
g:notes_indexfile option
This option defines the pathname of the optional keyword index used by the :SearchNotes to perform accelerated keyword searching.
g:notes_indexscript option
This option defines the pathname of the Python script that’s used to perform accelerated keyword searching with :SearchNotes.
g:notes_tagsindex option
This option defines the pathname of the text file that stores the list of known tags used for tag name completion and the :ShowTaggedNotes command. The text file is created automatically when it’s first needed, after that you can recreate it manually by executing :IndexTaggedNotes (see below).
g:notes_markdown_program option
The :NoteToHtml command requires the Markdown program. By default the name of this program is assumed to be simply markdown. If you want to use a different program for Markdown to HTML conversion, set this option to the name of the program.
g:notes_conceal_code option
By default the backticks that mark inline code snippets and the curly quotes that mark code blocks are hidden when your version of Vim supports concealing of text. By setting this option to zero you stop vim-notes from hiding these markers. For example in the following sentence, the backticks would be visible in the editor when this option is set to zero:
This is a sentence with an `inline code` fragment.
g:notes_conceal_italic option
By default the underscores that mark italic text are hidden when your version of Vim supports concealing of text. By setting this option to zero you stop vim-notes from hiding those underscores. In the following example, the underscores would be visible in the editor when this option is set to zero:
This is a sentence with _italic_ text.
g:notes_conceal_bold option
By default the stars that mark bold text are hidden when your version of Vim supports concealing of text. By setting this option to zero you stop vim-notes from hiding those stars. In the following example, the stars would be visible in the editor when this option is set to zero:
This is a sentence with *bold* text.
g:notes_conceal_url option
By default URL schemes (text fragments like http://) are hidden when your version of Vim supports concealing of text. By setting this option to zero you stop vim-notes from hiding URL schemes. In the following example, the https:// text would be visible in the editor when this option is set to zero:
You can find the vim-notes plug-in at https://github.com/xolox/vim-notes.
To edit one of your existing notes (or create a new one) you can use Vim commands such as :edit, :split and :tabedit with a filename that starts with note: followed by (part of) the title of one of your notes, e.g.:
:edit note:todo
This shortcut also works from the command line:
$ gvim note:todo
When you don’t follow note: with anything a new note is created like when you execute :Note without any arguments. If the note: shortcut is used from the command line, the environment variable $VIM_NOTES_TEMPLATE can be set to the filename of a template for new notes (this will override the default template).
:Note command
When executed without any arguments this command starts a new note in the current window. If you pass one or more arguments the command will edit an existing note containing the given words in the title. If more than one note is found you’ll be asked which note you want to edit. If no notes are found a new note is started with the given word(s) as title.
This command will fail when changes have been made to the current buffer, unless you use :Note! which discards any changes.
When you are using multiple directories to store your notes and you run :Note while editing an existing note, a new note will inherit the directory of the note from which you started. Otherwise the note is created in the first directory in g:notes_directories.
This command supports tab completion: If you complete one word, all existing notes containing the given word somewhere in their title are suggested. If you type more than one word separated by spaces, the plug-in will complete only the missing words so that the resulting command line contains the complete note title and nothing more.
:NoteFromSelectedText command
Start a new note in the current window with the selected text as the title of the note. The name of this command isn’t very well suited to daily use, that’s because it’s intended to be executed from a mapping. The default mapping for this command is \en (the backslash is actually the character defined by the mapleader variable).
When you are using multiple directories to store your notes and you run :NoteFromSelectedText while editing an existing note, the new note will inherit the directory of the note from which it was created.
:SplitNoteFromSelectedText command
Same as :NoteFromSelectedText but opens the new note in a vertical split window. The default mapping for this command is \sn.
:TabNoteFromSelectedText command
Same as :NoteFromSelectedText but opens the new note in a new tab page. The default mapping for this command is \tn.
:DeleteNote command
The :DeleteNote command deletes a note file, destroys the buffer and removes the note from the internal cache of filenames and note titles. If you pass a note name as an argument to :DeleteNote it will delete the given note, otherwise it will delete the current note. This fails when changes have been made to the buffer, unless you use :DeleteNote! which discards any changes.
:SearchNotes command
This command wraps :vimgrep and enables you to search through your notes using one or more keywords or a regular expression pattern. To search for a pattern you pass a single argument that starts/ends with a slash:
:SearchNotes /TODO\|FIXME\|XXX/
To search for one or more keywords you can just omit the slashes, this matches notes containing all of the given keywords:
:SearchNotes syntax highlighting
:SearchNotes understands @tags
If you don’t pass any arguments to the :SearchNotes command it will search for the word under the cursor. If the word under the cursor starts with ‘@’ this character will be included in the search, which makes it possible to easily add @tags to your @notes and then search for those tags. To make searching for tags even easier you can create key mappings for the :SearchNotes command:
" Make the C-] combination search for @tags:
imap <C-]> <C-o>:SearchNotes<CR>
nmap <C-]> :SearchNotes<CR>

" Make double mouse click search for @tags. This is actually quite a lot of
" fun if you don't use the mouse for text selections anyway; you can click
" between notes as if you're in a web browser:
imap <2-LeftMouse> <C-o>:SearchNotes<CR>
nmap <2-LeftMouse> :SearchNotes<CR>
These mappings are currently not enabled by default because they conflict with already useful key mappings, but if you have any suggestions for alternatives feel free to contact me through GitHub or at peter@peterodding.com.
After collecting a fair amount of notes (say more than 5 MB) you will probably start to get annoyed at how long it takes Vim to search through all of your notes. To make searching more scalable the notes plug-in includes a Python script which uses a persistent full text index of your notes stored in a file.
The first time the Python script is run it will need to build the complete index which can take a moment, but after the index has been initialized updates and searches should be more or less instantaneous.
:RelatedNotes command
This command makes it easy to find all notes related to the current file: If you are currently editing a note then a search for the note’s title is done, otherwise this searches for the absolute path of the current file.
:RecentNotes command
If you execute the :RecentNotes command it will open a Vim buffer that lists all your notes grouped by the day they were edited, starting with your most recently edited note. If you pass an argument to :RecentNotes it will filter the list of notes by matching the title of each note against the argument which is interpreted as a Vim pattern.
:MostRecentNote command
This command edits your most recently edited note (whether you just opened the note or made changes to it). The plug-in will remember the most recent note between restarts of Vim and is shared between all instances of Vim.
:ShowTaggedNotes command
To show a list of all notes that contains @tags you can use the :ShowTaggedNotes command. If you pass a count to this command it will limit the list of tags to those that have been used at least this many times. For example the following two commands show tags that have been used at least ten times:
:10ShowTaggedNotes
:ShowTaggedNotes 10
:IndexTaggedNotes command
The notes plug-in defines an omni completion function that can be used to complete the names of tags. To trigger the omni completion you type Control-X Control-O. When you type @ in insert mode the plug-in will automatically start omni completion.
The completion menu is populated from a text file listing all your tags, one on each line. The first time omni completion triggers, an index of tag names is generated and saved to the location set by g:notes_tagsindex. After this file is created, it will be updated automatically as you edit notes and add/remove tags.
If for any reason you want to recreate the list of tags you can execute the :IndexTaggedNotes command.
:NoteToHtml command
This command converts the current note to HTML. It works by first converting the current note to Markdown and then using the markdown program to convert that to HTML. It requires an external program to convert Markdown to HTML. By default the program markdown is used, but you can change the name of the program using the g:notes_markdown_program option. To convert your note to HTML and open the generated web page in a browser, you can run:
:NoteToHtml
Alternatively, to convert your note to HTML and display it in a new split window in Vim, you can run:
:NoteToHtml split
Note that this command can be a bit slow, because the parser for the note taking syntax is written in Vim script (for portability) and has not been optimized for speed (yet).
:NoteToMarkdown command
Convert the current note to a Markdown document. The vim-notes syntax shares a lot of similarities with the Markdown text format, but there are some notable differences, which this command takes care of:
The first line of a note is an implicit document title. In Markdown format it has to be marked with #. This also implies that the remaining headings should be shifted by one level.
Preformatted blocks are marked very differently in notes and Markdown ({{{ and }}} markers versus 4 space indentation).
The markers and indentation of list items differ between notes and Markdown (dumb bullets vs Unicode bullets and 3 vs 4 spaces).
Note that this command can be a bit slow, because the parser for the note taking syntax is written in Vim script (for portability) and has not been optimized for speed (yet).
:NoteToMediawiki command
Convert the current note to a Mediawiki document. This is similar to the :NoteToMarkdown command, but it produces wiki text that can be displayed on a Mediawiki site. That being said, the subset of wiki markup that vim-notes actually produces will probably work on other wiki sites. These are the notable transforations:
The first line of the note is a title, but it isn’t used in the Mediawiki syntax. It could have been put into a = Title = tag, but it doesn’t really make sense in the context of a wiki. It would make the table of contents nest under the title for every document you create.
Preformatted blocks are output into <syntaxhighlight lang=".."> tags. This functionality is enabled on Mediawiki through the SyntaxHighlight GeSHi extention. It is also supported on Wikipedia.
The following key mappings are defined inside notes.
@ automatically triggers tag completion' becomes ‘ or ’ depending on where you type it" becomes “ or ” (same goes for these)-- becomes —-> becomes →<- becomes ←*, - and + become •*** in insert mode in quick succession insert a horizontal ruler delimited by empty linesTab and Alt-Right increase indentation of list items (works on the current line and selected lines)Shift-Tab and Alt-Left decrease indentation of list itemsEnter on a line with only a list bullet removes the bullet and starts a new line below the current line\en executes :NoteFromSelectedText\sn executes :SplitNoteFromSelectedText\tn executes :TabNoteFromSelectedTextThe syntax mode for notes is written so you can override styles you don’t like. To do so you can add lines such as the following to your vimrc script:
" Don't highlight single quoted strings.
highlight link notesSingleQuoted Normal

" Show double quoted strings in italic font.
highlight notesDoubleQuoted gui=italic
See the documentation of the :highlight command for more information. Below are the names of the syntax items defined by the notes syntax mode:
notesName - the names of other notes, usually highlighted as a hyperlinknotesTagName - words preceded by an @ character, also highlighted as a hyperlinknotesListBullet - the bullet characters used for list itemsnotesListNumber - numbers in front of list itemsnotesDoubleQuoted - double quoted stringsnotesSingleQuoted - single quoted stringsnotesItalic - strings between two _ charactersnotesBold - strings between two * charactersnotesTextURL - plain domain name (recognized by leading www.)notesRealURL - URLs (e.g. http://vim.org/)notesEmailAddr - e-mail addressesnotesUnixPath - UNIX file paths (e.g. ~/.vimrc and /home/peter/.vimrc)notesPathLnum - line number following a UNIX pathnotesWindowsPath - Windows file paths (e.g. c:\users\peter\_vimrc)notesTodo - TODO markersnotesXXX - XXX markersnotesFixMe - FIXME markersnotesInProgress - CURRENT, INPROGRESS, STARTED and WIP markersnotesDoneItem - lines containing the marker DONE, usually highlighted as a commentnotesDoneMarker - DONE markersnotesVimCmd - Vim commands, words preceded by an : characternotesTitle - the first line of each notenotesShortHeading - short sentences ending in a : characternotesAtxHeading - lines preceded by one or more # charactersnotesBlockQuote - lines preceded by a > characternotesRule - lines containing only whitespace and * * *notesCodeStart - the {{{ markers that begin a block of code (including the syntax name)notesCodeEnd - the }}} markers that end a block of codenotesModeLine - Vim modeline in last line of notesnotesLastEdited - last edited dates in :ShowTaggedNotes buffersThe utl.vim universal text linking plug-in enables links between your notes, other local files and remote resources like web pages.
My shell.vim plug-in also enables easy navigation between your notes and environment like local files and directories, web pages and e-mail addresses by providing key mappings and commands to e.g. open the file/URL under the text cursor. This plug-in can also change Vim to full screen which can be really nice for large notes.
The VOoM outlining plug-in should work well for notes if you use the Markdown style headers starting with #, however it has been reported that this combination may not always work so well in practice (sometimes losing notes!)
If the text formatting supported by the notes plug-in is not enough for you, consider trying the Txtfmt (The Vim Highlighter) plug-in. To use the two plug-ins together, create the file after/ftplugin/notes.vim inside your Vim profile with the following contents:
" Enable Txtfmt formatting inside notes.
setlocal filetype=notes.txtfmt
If you write your git commit messages in Vim and want to use the notes file type (syntax highlighting and editing mode) to edit your git commit messages you can add the following line to your vimrc script:
au BufNewFile,BufRead *.git/COMMIT_EDITMSG setf notes
This is not a complete solution (there are more types of commit messages that the pattern above won’t match) but that is outside the scope of this document. For inspiration you can take a look at the runtime/filetype.vim file in Vim’s Mercurial repository.
Session scripts cannot be shared between platforms because they contain absolute pathnames that most certainly won’t match between e.g. Windows and Linux or even Windows and Cygwin. The best you can do is keep separate session scripts for different platforms (and I would certainly consider Cygwin a separate platform altogether :-). For more information please refer to issue #85.
If you have questions, bug reports, suggestions, etc. the author can be contacted at peter@peterodding.com. The latest version is available at http://peterodding.com/code/vim/notes/ and http://github.com/xolox/vim-notes. If you like the script please vote for it on Vim Online.
This software is licensed under the MIT license.
© 2015 Peter Odding <peter@peterodding.com>.
Last updated Mon Jun 08 19:07:24 UTC 2015.